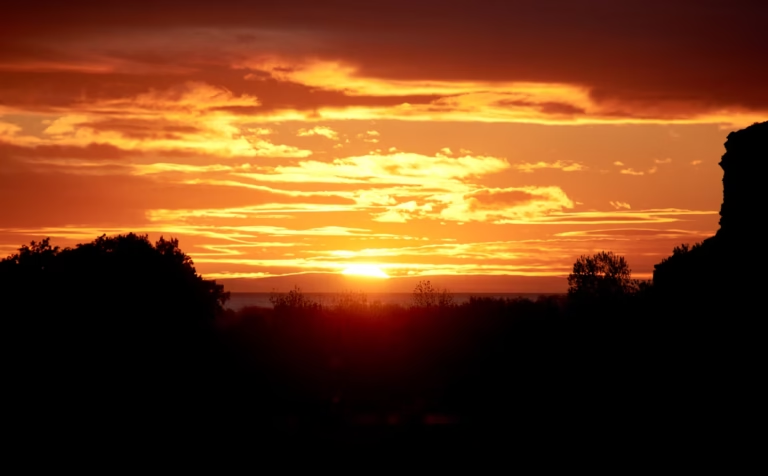
Photography is more than just pointing a camera at a subject; it’s about painting with light. The quality, direction, and intensity of light often determine whether a photo looks ordinary or extraordinary. Among all the types of natural light, none is more enchanting than the golden hour.
The golden hour refers to the short window of time just after sunrise and just before sunset, when the sun hangs low in the sky. During this period, the light transforms into a soft, warm glow that photographers around the world treasure. It’s a fleeting moment, but when used correctly, it can turn even the simplest subject into a masterpiece.
In this article, we’ll break down what makes golden hour so magical, explore tips and techniques to help you capture it, and answer common questions so you can step outside with confidence and create jaw-dropping images.
Related Articles:
What is Golden Hour Photography?
Golden hour photography is the art of capturing images during the time of day when sunlight is naturally at its most flattering. Specifically:
- Morning golden hour: Begins shortly after sunrise and lasts around an hour, depending on your location and the season.
- Evening golden hour: Starts about an hour before sunset and continues until the sun dips below the horizon.
Because the sun is positioned lower in the sky, the light travels through more of the Earth’s atmosphere. This process scatters blue wavelengths and allows warmer tones like yellows, oranges, and reds to dominate. The result? A natural golden filter that makes subjects look radiant, landscapes more colorful, and shadows more dramatic.
What Makes Golden Hour Special?
So why do photographers go out of their way to plan shoots around this time? The magic lies in four unique qualities of golden hour light:
Soft & Diffused Light
At midday, sunlight is harsh and direct, producing strong shadows and overexposed highlights. During golden hour, however, the sun’s angle softens its rays. This diffused light wraps around subjects, minimizing blemishes in portraits and eliminating hard contrasts in landscapes. It’s almost like having a built-in softbox in the sky.
Warm, Reddish Hue
When the atmosphere filters sunlight, it leaves behind warm hues that naturally flatter skin tones and enrich landscapes. The “honey-toned” colors of golden hour evoke warmth, joy, and nostalgia making photos feel more emotionally compelling.
Long Shadows
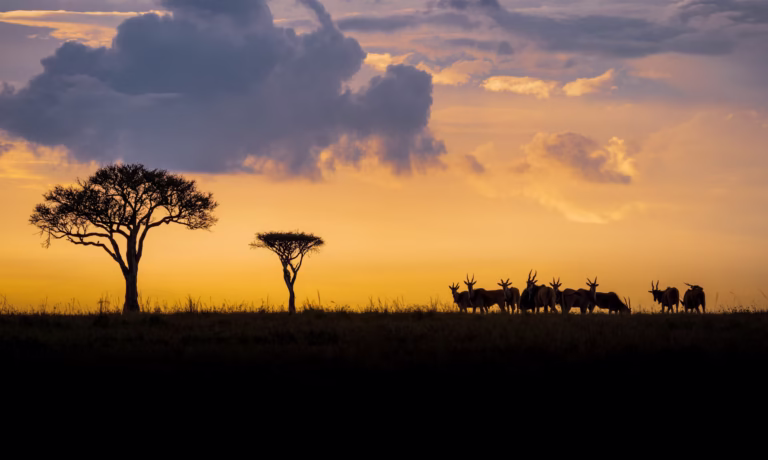
As the sun dips closer to the horizon, it casts elongated shadows. These shadows add drama, texture, and leading lines that enhance composition. They can also introduce an element of storytelling.
Enhanced Colors
Golden hour light acts like a natural saturation booster. The greens of a meadow, the blues of the sky, and the reds of autumn leaves all appear more vivid. Unlike editing filters, this richness feels natural and organic.
8 Essential Golden Hour Photography Tips
Now that we’ve explored why golden hour is so magical, let’s dive into practical ways to make the most of it. These tips work for both beginners and professionals, whether you’re shooting portraits, landscapes, or street scenes.
Check the Timing
Golden hour isn’t the same everywhere. Depending on your location and the season, it may last as little as 30 minutes or extend closer to an hour. Use apps like PhotoPills, Golden Hour, or The Photographer’s Ephemeris to find precise times for your area. Planning ensures you won’t miss the light’s best moments.
Use Long Shadows Creatively
Look for ways to incorporate shadows into your composition. A row of trees casting elongated silhouettes or a person’s shadow stretching across a sandy beach can add intrigue. Try shooting from different angles to exaggerate or minimize their effect.
Adapt to Rapid Light Changes
Golden hour light changes quickly, sometimes dramatically in just minutes. To keep up:
- Start with a low ISO (100–400) for clear shots.
- Adjust shutter speed as the light dims.
- Open your aperture wider (f/1.8–f/4) to let in more light.
- Use exposure bracketing to capture multiple versions of the same shot for safety.
Meter for Your Subject
Because golden hour often creates strong contrasts between highlights and shadows, metering is crucial. Use spot metering on your subject to ensure they’re exposed correctly, even if the background appears brighter or darker.
Watch Your Position
It’s easy to forget about your own shadow, especially when the sun is low. Check your frame carefully and reposition yourself to avoid unwanted shadows. Alternatively, you can intentionally include your shadow as a creative element.
Experiment with Backlighting
One of the most beautiful techniques at golden hour is backlighting, placing the sun behind your subject. This creates glowing outlines, dreamy flares, and atmospheric haze. Use a lens hood or your hand to control excessive lens flare, and try adjusting angles until you find the perfect balance.
Use Wide Apertures for Depth
Golden hour pairs wonderfully with shallow depth of field. Using a wide aperture (like f/2.8 or f/1.8) isolates your subject, blurs the background, and turns distant lights into creamy bokeh balls. This is particularly effective in portraits.
Embrace Warm Tones
Don’t fight the natural warmth, embrace it. Enhance the yellows and oranges in post-processing rather than neutralizing them. These tones are what make golden hour images emotionally rich and universally appealing.
Bonus Tips for Advanced Photographers
If you’re looking to push your golden hour photography even further, here are a few advanced techniques:
- Silhouettes: Position your subject between the camera and the sun for dramatic outlines.
- HDR Blending: Combine multiple exposures to balance bright skies with darker foregrounds.
- Lens Flare Play: Instead of avoiding flares, use them as artistic elements to add mood.
- Foreground Interest: Add layers by including objects like flowers, fences, or water reflections in your foreground.
Common Mistakes to Avoid
Even during golden hour, things can go wrong. Here are pitfalls to watch for:
- Arriving Late: By the time you set up, the best light may already be gone. Arrive at least 20–30 minutes early.
- Overexposure: Warm tones can trick your camera’s meter. Always check your histogram to avoid blown highlights.
- Ignoring Composition: Beautiful light won’t save a poorly framed shot. Remember the rule of thirds, leading lines, and framing.
- Relying Only on Auto Mode: Manual or semi-manual modes give you better control as light changes rapidly.
FAQ
1. How long does golden hour last?
Typically, 30–60 minutes depending on your location and season. Near the equator, it’s shorter; in higher latitudes, it can last longer.
2. Which is better for photos, sunrise or sunset golden hour?
Both are stunning. Sunrise often has fewer crowds and crisper air, while sunset tends to produce richer colors.
3. Can I shoot golden hour photography with a smartphone?
Yes! Modern smartphones with manual modes and HDR features can capture golden hour beautifully.
4. What camera settings are best for golden hour?
Start with ISO 100–400, aperture f/2.8–f/5.6 for portraits, or f/8–f/11 for landscapes, and adjust shutter speed as light fades.
5. Should I use filters during golden hour?
Graduated ND filters can help balance bright skies and darker land. A polarizer can reduce reflections but may alter warm tones.
6. How do I avoid lens flare?
Use a lens hood, your hand, or position the sun slightly outside the frame. Alternatively, embrace flares for creative effect.
7. Do I need a tripod?
A tripod is useful for landscapes, long exposures, and bracketing as light dims, but not mandatory for handheld portraits.
8. Can I shoot in RAW or JPEG?
Always shoot in RAW for maximum flexibility in post-processing, especially since golden hour involves dynamic lighting.
9. What if clouds block the sun?
Clouds can actually enhance golden hour by diffusing the light further and creating colorful skies.
10. How do I prepare for a golden hour shoot?
Scout your location in advance, plan your compositions, and arrive early with your gear set up.
Conclusion
Golden hour is every photographer’s natural playground. Its soft, warm, and directional light can elevate even the simplest subjects into breathtaking works of art. With the right timing, careful attention to settings, and creative experimentation, you can consistently capture stunning golden hour images.
Plan ahead, embrace the fleeting light, and let golden hour turn your vision into unforgettable photographs.